• made in usa
  • /
  • veteran-owned

Pre-Installation

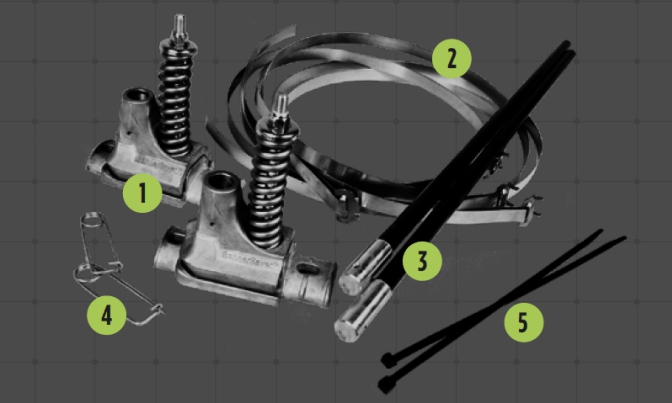
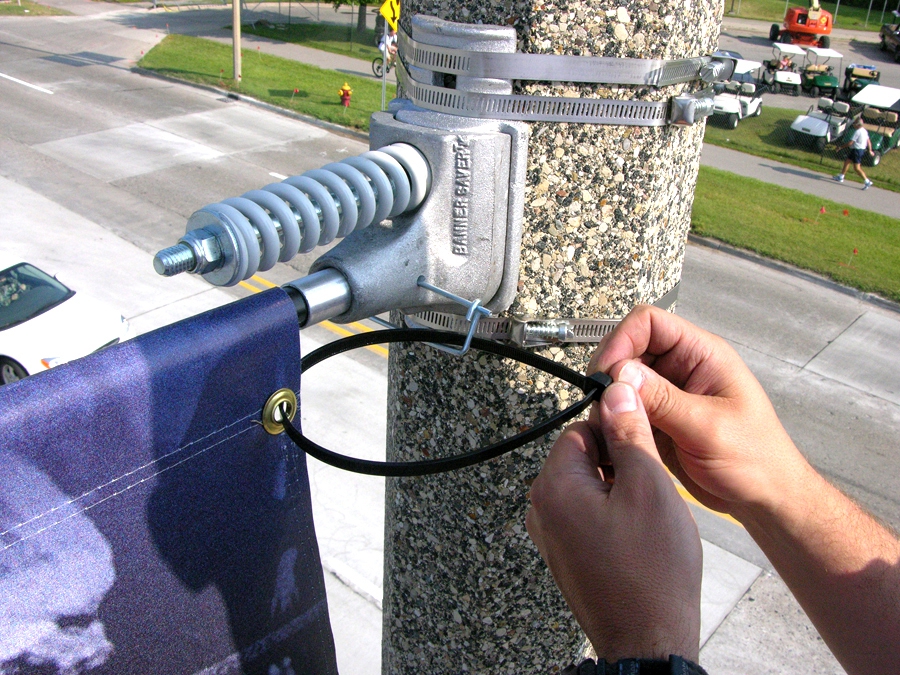
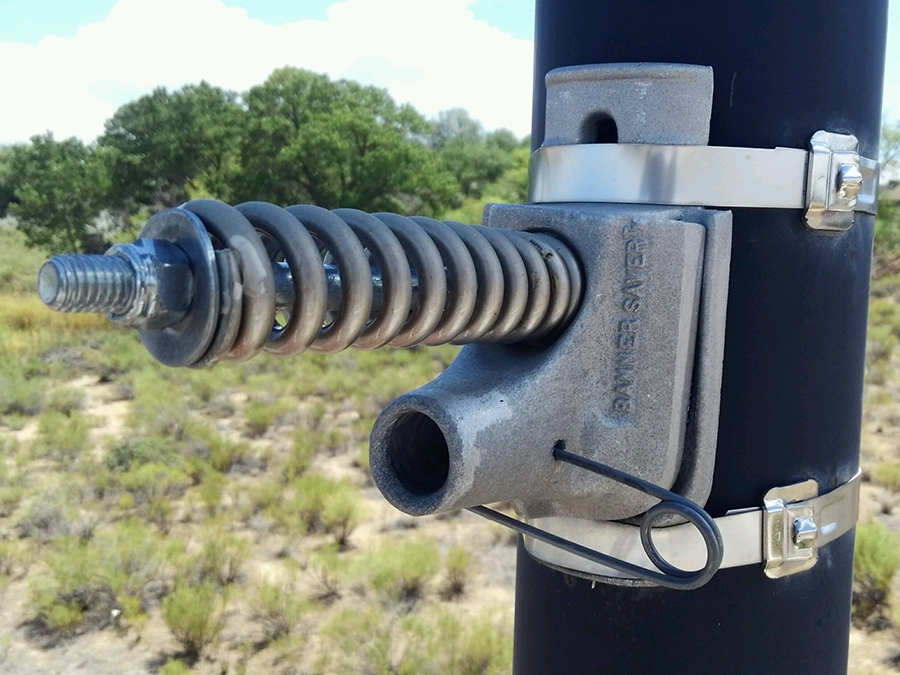
Congratulations! You’ve chosen BannerSaver™, the world’s premier wind-spilling banner bracket. Before you begin installation – familiarize yourself with the components of a BannerSaver™ kit, gather the additional tools needed for proper installation and ensure you’ve purchased the correct banding for your project.

Necessary Components

The following components are required for you to install your light pole banners:

  1. BannerSaver™ brackets
  2. Banding (not included in our BannerSaver™ Banner Bracket Kits)
  3. Fiberglass arms
  4. Pins
  5. Zip Ties
Components

Required Tools

Which Banding?

There are many variables to consider when selecting your preferred banding type, Standard Banding or Heavy Banding. Factors you should consider are:

Standard Banding

  • Uses 6 bands per set.
  • Also called Hose Clamp Banding.
  • Recommended for installation on round poles with the BannerSaver™ Standard model size (banners up to 20 sq ft).

Heavy Duty Banding

  • Uses 4 bands per set.
  • Heavy Duty Banding is required for the BannerSaver™ Large and Extra-Large but it is ideal for all jobs because they provide a tighter grip and reduce your maintenance costs over the long run (see section on Maintenance).
  • Heavy Duty Banding is recommended for most jobs with square poles regardless of banner size or BannerSaver™ model because it is sometimes difficult to get a good grip around four corners with Standard Banding.
  • The higher profile of a banner program/campaign should also consider Heavy Duty Banding.
  • Custom cut/priced based on the diameter of your light pole.
  • Requires banding tool.

Available PDF Download: Standard Banding or Heavy Banding?

Standard banding installed Standard Banding
Heavy duty banding installed Heavy Duty Banding